Author Archives: Dom

About Dom

This is the biographical bit about myself! Well I'm a slave to technology and this it were I'm putting all the stuff I didn't quite figure out by-my-self at the time, so I have posted all the fixes!

DNS timeout on Draytek Router

DNS timeout 

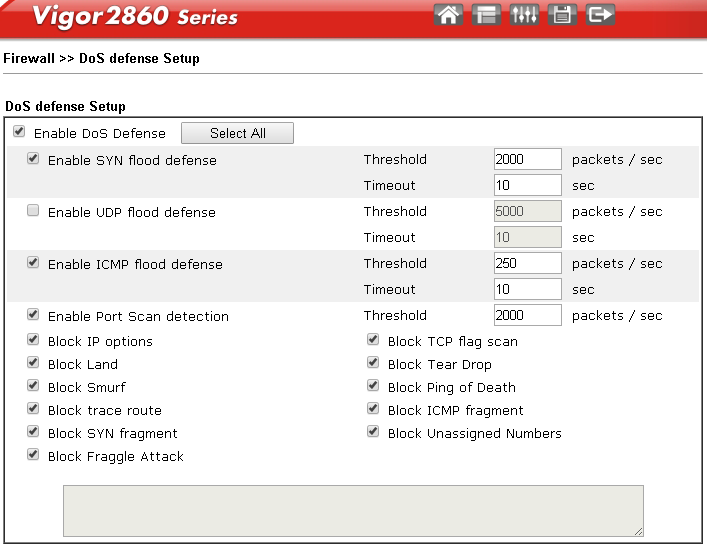
Having had a problem with my TalkTalk internet connection for months I thought the issue was related to TalkTalk DNS settings however this was actually due to the “UDP flood defense” setting on the Draytek “Firewall” which blocks DNS queries after a threshold value.

The symptoms were that DNS would just stop working, no DNS resolution at all, NSLOOKUPs would simply timeout but ping and IP resolution would function normally. Rebooting the Draytek would magically fix the issue.

The fix was to simply increase the “packet/sec Threshold” or “disable” the setting.
Note: The DoS defense settings are not enabled by default


Continue reading

Dell PowerEdge Servers | iDRAC Interface & Connection Issues

Configuring iDRAC IP (From Windows)

If you want to configure the iDRAC while in Windows the best option is to install “Dell Open Manage Server Administrator” this will allow you to open the web interface and assign the iDRAC IP. The default iDRAC IP is “192.168.0.120” so unless you have a system on this subnet to connect you will need to use another method.

  • Default OMSA address: https://localhost:1311/
  • Authentication is using a standard Windows Administrator username/password without the “domain\”
  • The iDRAC options are displayed under: System -> Main System Chassis -> Remote Access

If you are configuring iDRAC outside windows the default login is:

  • Default Username: root
  • Default Password: Calvin

Unable to connect to iDRAC IP:

If you are unable to connect to the iDRAC via HTTP/Web Interface even though it is responding to ICMP (Ping) request it most likely needs a kick! or a reboot (of just that component) Best option is to putty into it.

Resets/Reboots iDRAC:

  • racadm racreset (Reset)
  • racadm -r <ip address> -u <username> -p <password> racreset(Passthough Credentials)
  • racadm -r <ip address> -i racreset (Prompt for Credentials)


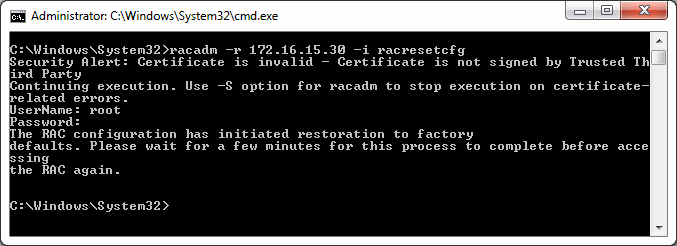
Resets/Reboots iDRAC (Factory Defaults):

  • racadm racresetcfg (Reset)
  • racadm -r <ip address> -u <username> -p <password> racresetcfg (Passthough Credentials)
  • racadm -r <ip address> -i racresetcfg (Prompt for Credentials)

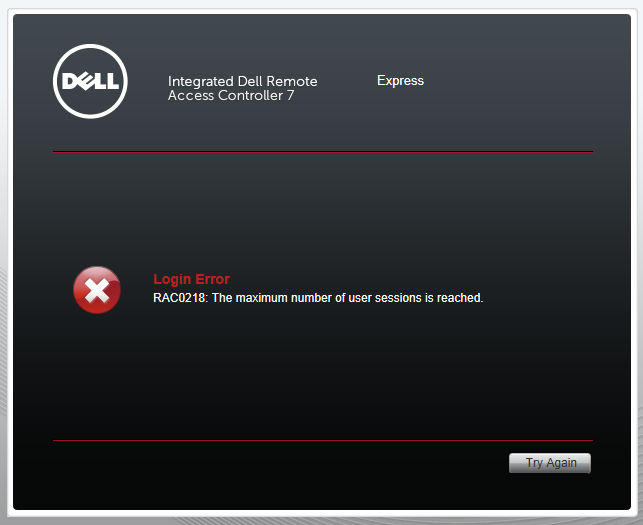
Unable to connect to iDRAC “Maximum number of user sessions is reached”

I tried to SSH to the IP using putty (Method Above) but got the same error.

In order to resolve this I used the following command from another server which had Dell Open Manage installed.

racadm -r 192.168.1.2 -u root -p Passw0rd racreset soft
racadm -r 192.168.1.2 -i racreset soft

Downloads:

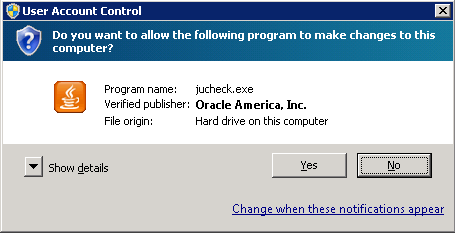
Disable Java Update | Windows

Quickest solution to stop this annoying update prompt is to use this regedit and which modifies the “Update” DWORD.
This update prompt is even more annoying if the user does not have local administrator rights.

Windows Registry Editor Version 5.00

[HKEY_LOCAL_MACHINE\SOFTWARE\Wow6432Node\JavaSoft\Java Update\Policy]

"EnableJavaUpdate"=dword:00000000
"EnableAutoUpdateCheck"=dword:00000000

Enable ICMP (Ping) & WMI | CMD Line

Without enabling ICMP ping requests will not get a reply from the server.

Enable ICMP using “netsh firewall” (Old Method):

netsh firewall set icmpsetting 8

Enable ICMP using “netsh advfirewall” (New Method):

netsh advfirewall firewall add rule name="ICMP Allow incoming V4 echo request" protocol=icmpv4:8,any dir=in action=allow

Enable WMI using “netsh advfirewall” (New Method):

netsh advfirewall firewall set rule group="windows management instrumentation (wmi)" new enable=yes

Veeam Backup | Benchmarks

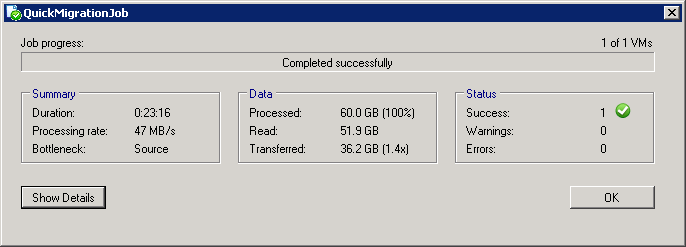
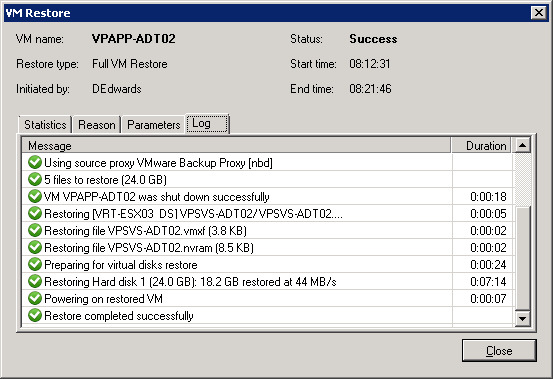
I’ve been using VMWare converter and Veeam Replication for a while now but still ask myself the question of “How long will this take to migrate or P2V”

Here’s some results to help with the expected performance…

1 VM Move – Server to Server on LAN (1GBPS Switch)

1 VM Restore – Reverse Incremental Backup on iSCSI to Server on LAN (1GBPS Switch)

Unable to Access DFS Share | Windows 7 Mapped Drives

Mapped network drive to DFS share is not allowing access.

“This operation is supported only when you are connected to the server”

If you try to remap the drive with different credentials the following error appears:

The network folder specified is currently mapped using a different username and password.

To connect using a different user name and password, first disconnect any existing mappings to this network share.

Looking in the EventVWR the following is logged:

EventID1004: Path \Server\DFS transitioned to slow link with latency = 115 and bandwidth = 13265936

  • Rebooting doesn’t fix the issue
  • Remapping doesn’t fix the issue.
  • Entering the direct server UNC path allows full access (as it should)
  • Applied regedit to force Auto Reconnect to the server but still didn’t fix the issue.
Windows Registry Editor Version 5.00

[HKEY_LOCAL_MACHINE\SOFTWARE\Microsoft\Windows\CurrentVersion\NetCache]
"SilentForcedAutoReconnect"=dword:00000001

Fix:

In the end the really simple workaround was to “Disable Offline File Sync” and reboot the system. All working again!

“Control Panel -> Sync Centre ->  Manage offline files -> Disable Offline Files”

Reference:

http://blogs.technet.com/b/askds/archive/2011/12/14/slow-link-with-windows-7-and-dfs-namespaces.aspx
https://www.conetrix.com/Blog/post/Fixing-Problem-With-Windows-7-Shared-Files-and-Mapped-Drives-Unavailable-Over-VPN.aspx
Windows Backup | Adding Multiple External HDDs

Windows Backup can be configured to use multiple external hard drives as the target. This way you can setup a hard drive rotation system i.e. Mon: USB_HDD1, Tue: USB_HDD2, Wed: USB_HDD1

Ideally both HDDS (or more) need to be connected at the same time when you configure the backup from the GUI. If you do not have both HDDS connected this can be accomplished using the WBADMIN command line tool.

Locate the HDD identifier using “get disk” and add it to the job using “-addtarget”.

wbadmin get disks
WBADMIN ENABLE BACKUP -addtarget:{xxxxxxxx-xxxx-xxxx-xxxx-xxxxxxxxxxxx}

Reference:

PSEXEC | Remove File Share Remotely

Sometime it takes time to go and speak to a user, then stop what they are doing so you can make a change or tweak on their PC/Laptop so I like to do this in the background remotely without their knowledge (Hey! I’m an Admin that’s what I do)

PSEXEC has become a good friend for doing this!
I usually dump the “psexec” exe in the c:\Windows\System32 folder so I don’t have to change CMD paths. (Remember you need to run CMD as the user with access to the remote system for this to work)

Remove Share Remotely:

psexec \\PCNAME net share &lt;SHARENAME&gt; /delete

Map Drive Remotely:

psexec \\PCNAME net use S: \\SERVER\SHARE

RSAT Across Domains | Security database on the server does not have a computer account for this workstation trust relationship

Problem when trying to use RSAT to remotely administer a different domain.

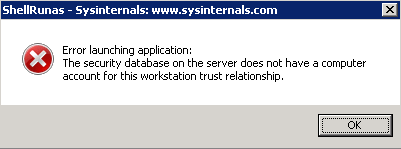
“Security database on the server does not have a computer account for this workstation trust relationship”

There are numerous blog/forum posts regarding the cause of this error, however most are related to workstations on the local domain not being able to authenticate to the local DC. (The quick fix being to remove the network cable, login with the cached credentials and remove/readd the PC to the domain.

On this occasion I was trying to use RSAT to manage DHCP on an alternative domain. The connectivity is in place with a Non-Transitive Trust between Domain A and Domain B but I was trying to administer Domain C!

The really simple fix was to use the command line “runas /netonly” which allows MMC to run as an alternative user (in the destination domain) seamlessly “/netonly” allows you to run applications as a local user but authenticating over the network as another user.

runas /netonly /user:domain\username "mmc dhcpmgmt.msc /server=DC"

Note: On Windows Server 2008 holding the “shift” key and right clicking on MMC will not display the “runas” function as in Windows Server 2008 R2 or Windows 7. A quick workaround is to use the “ShellRunAs” Sysinternals tools. Simply drag and drop the exe/msc onto the tool and it will prompt to run with alternative credentials.

References: http://ss64.com/nt/runas.html

VMware | “You cannot use the vSphere Client to edit the settings”

After carrying out a re-install of ESXi 5.5 and attaching the VMs the “edit settings” are unavailable.

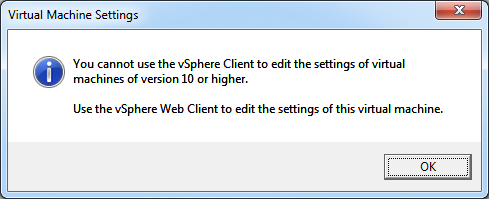
“You cannot use the vSphere Client to edit the settings of the virtual machines of version 10 or higher.

User the vSphere Web Client to edit the settings of this virtual machine”

As vCentre wasn’t in place for this scenario the workaround was to directly edit the VMs .vmx file.

  1. Load vSphere Client
  2. Select VM: “Remove from Inventory”
  3. Select Storage: “Browse Datastore”
  4. Select VM Folder: Locate/Download “.vmx” file (approximately 3/4 KB)
  5. Edit in Notepad
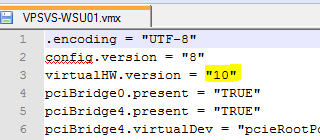
  6. Modify the “virtualHW.version = “10” to “8”
  7. Upload “.vmx” file back to VM Folder
  8. Select “.vmx” and “Add to Inventory”
  9. VM should now be editable.


Formatting Device | “diskpart”

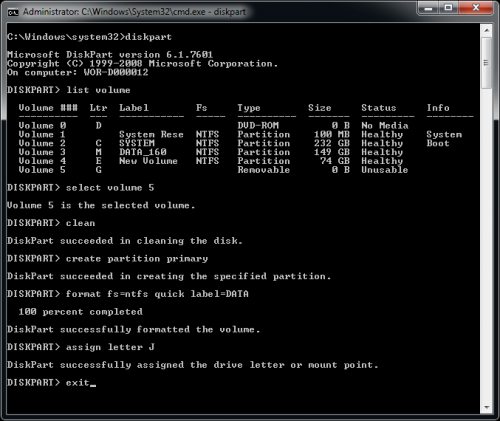
Formatting a USB Flash Drive using the “diskpart” utility:

Diskpart also resolves issues with formatting within Windows GUI:

Error: “Format Cannot Run because the volume is in use by another process” & “Will not format – unknown capacity

CMD

diskpart
list volume
select volume X
clean
create partition primary
format fs=ntfs quick label=DATA
assign letter X

SubACL & iCALCS

SUBINACL (SubInACL.exe)

SubInACL is an alternative command line tool to iCACLS that enables administrators to obtain security information about files, registry keys, and services, and transfer this information from user to user, from local or global group to group, and from domain to domain.

iCACLS

iCACLS example of modifying file permissions:

@echo off
REM ** /T = Performs the operation on all specified files in the current directory and its subdirectories.
REM ** /F = Full Access
REM ** /M = Modify Access
if exist "C:\Program Files (x86)" goto 64
icacls "%ProgramFiles%\Folder" /inheritance:e /grant "MyDomain\Domain Users":M /T
goto next
:64
icacls "%ProgramFiles(x86)%\Folder" /inheritance:e /grant "MyDomain\Domain Users":M /T
next
pause

VMware | Enable SNMP

Although SNMP traps can be configured within Windows VMs installed on the VMWare host it can also be configured to report directly from ESXi. This configuration helps monitoring software such as Solarwinds or Spiceworks.

Configure ESXi SNMP via CLI (with Prompts):

Download/Install: VMware vSphere CLI 5.1

@echo off
echo Enter the FQDN of the host:
set /p hostname=
echo Enter the root password:
set /p password=
set user=root
"C:\Program Files (x86)\VMware\VMware vSphere CLI\bin\vicfg-snmp.pl" --server %hostname% --username %user% --password %password% -c ESX -t 200.200.200.200@161/ESX --enable
"C:\Program Files (x86)\VMware\VMware vSphere CLI\bin\vicfg-snmp.pl" --server %hostname% --username %user% --password %password% -show &gt;&gt; c:\ESXi_SNMP.log
pause

Continue reading

Lync 2013 Deployment

Excellent post on the deployment of Lync 2013 via Script: Unifiedme.co.uk

I customized the Lync installation using the Office /admin application (see above) and then pushed this out to users via script/GPO. This is a very basic script to check whether Lync is already installed, if not then will run the setup.exe using the custom installer in the “updates” folder.

REM Automated Installer for Lync 2013
REM Note the setup.exe uses a custom .MSP to install lync with settings, registry keys and product activation.
 
@echo off
if exist "C:\Program Files (x86)\Microsoft Office\Office15\lync.exe" goto quit
if exist "C:\Program Files\Microsoft Office\Office15\lync.exe" goto quit
if exist "C:\Program Files (x86)\Microsoft Lync\communicator.exe" goto quit
:install
\\server\Software\SW_DVD5_Lync_2013_32-BIT_X64_English_MLF_X18-54527\setup.exe
:quit
exit

I’d be interested to know if there is a much better way to do this as it really is very basic and doesn’t include error handling.