Category Archives: Windows Vista

Windows Time Commands | Cheatsheet

Check time service is running (Local & Remote):

sc query w32time
sc \\HOSTNAME query w32time

Displays all local time information (Local & Remote):

w32tm /query /configuration
w32tm /query /configuration /computer:HOSTNAME

Display Windows Time service status (Local & Remote):

w32tm /query /status
w32tm /query /status /computer:HOSTNAME

Display Windows Time service source (Will return one line: local CMOS vs Server) (Local & Remote):

w32tm /query /source
w32tm /query /source /computer:HOSTNAME

Display a list of peers and their status:

w32tm /query /peers

Displays current time (local source)

Time /T

Resync local computer time against time server: (run on all servers, except time server)

w32tm /resync /rediscover 

Force local computer time to update against domain server (Local & Remote):

w32tm /config /syncfromflags:domhier /update
w32tm /resync /rediscover w32tm /resync
w32tm /config /syncfromflags:domhier /update /computer:HOSTNAME
w32tm /resync /rediscover w32tm /resync

Start time server via CLI (Local & Remote)

net start w32time
SC \\HOSTNAME net start w32time

Restore Windows Time Service (if it has been broken)

net stop W32Time
w32tm /unregister
w32tm /register
net start W32Time
sc query W32Time

Set Time Update NTP source

@echo off
net stop w32time
w32tm /config /syncfromflags:manual /manualpeerlist: 0.uk.pool.ntp.org
w32tm /config /reliable:yes
net start w32time
w32tm /query /peers
PAUSE

Event Viewer Error Message:

Event Type: Error 

Event Source: W32Time 

Event Category: None 
Event ID: 12

Description: Time Provider NtpClient: This machine is configured to use the domain hierarchy to determine its time source, but it is the PDC emulator for the domain at the root of the forest, so there is no machine above it in the domain hierarchy to use as a time source. It is recommended that you either configure a reliable time service in the root domain, or manually configure the PDC to synchronize with an external time source. Otherwise, this machine will function as the authoritative time source in the domain hierarchy. If an external time source is not configured or used for this computer, you may choose to disable the NtpClient.

To resolve the eventID 12:

  • w32tm /register

Reference: 

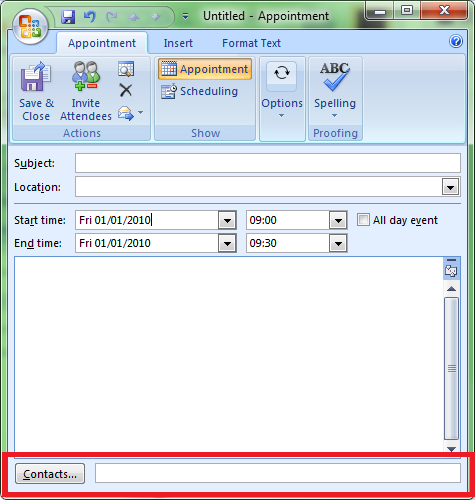
Enabling the “Contact Linking Field” in Outlook 2007/2010/2013

The “Contact linking field” isn’t always displayed by default in Outlook:

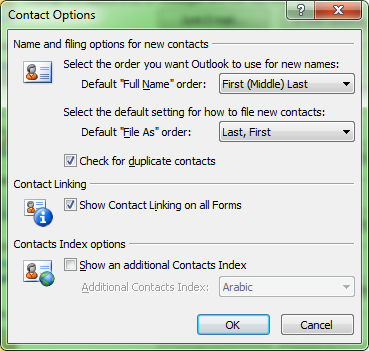
To display the “contacts” selection box for an “event” in Outlook 2007

Tools > Options > Contact Options > "Show Contact Activity Information on All Forms"

Continue reading

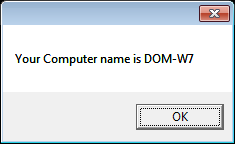
Show Host Name via VBS (ShowHost.vbs)

Simple script to show host name of the local machine in a popup window add code to “ShowHost.vbs”

Dim Shell
Dim CompName
Set Shell = WScript.CreateObject("WScript.Shell")
CompName = Shell.ExpandEnvironmentStrings("%COMPUTERNAME%")
Msgbox "Your Computer name is " & CompName

WinRM for Event Forwarding

Windows Remote Management (WinRM) required by Windows Remote Shell command-line tool, Winrs, event forwarding, and Windows PowerShell 2.0.

WinRM service starts automatically on Windows Server 2008, but must be started manually on Windows Vista.

  • Show WinRM Status: “winrm get winrm/config”
  • Show WinRM Help: “winrm help config”
  • Setup WinRM: “winrm qc” (Quick Config)

Performs the following operations:

  • Starts the WinRM service, and sets the service startup type to auto-start.
  • Configures a listener for the ports that send and receive WS-Management protocol messages using either HTTP or HTTPS on any IP address.
  • Defines ICF exceptions for the WinRM service, and opens the ports for HTTP and HTTPS. (Only for the current user profile)

Reference: http://msdn.microsoft.com/en-us/library/aa384372(v=vs.85).aspx


WSUS (wuauclt.exe) | Updates CLI

Detectnow Option

Because waiting for detection to start can be a time-consuming process, an option has been added to allow you to initiate detection right away. On one of the computers with the new Automatic Update client installed, run this at command prompt:

wuauclt.exe /detectnow

Resetauthorization Option

WSUS uses a cookie on client computers to store various types of information, including computer group membership when client-side targeting is used. By default this cookie expires an hour after WSUS creates it. If you are using client-side targeting and change
group membership, use this option in combination with detectnow to expire the cookie, initiate detection, and have WSUS update computer group membership.

Note that when combining parameters, you can use them only in the order specified as follows:

wuauclt.exe /resetauthorization /detectnow

Windows Server Update Services (WSUS) Support Tools:

CLI for WUAUCLT:

Source: http://technet.microsoft.com/en-us/library/cc708617(WS.10).aspx

Outlook 2007 File Locations

To access the folder holding the toolbar, VBA, send & receive settings, and nickname files, copy and paste:

  • Vista/W7: %USERPROFILE%\AppData\Roaming\Microsoft\Outlook
  • XP: %USERPROFILE%\Application Data\Microsoft\Outlook

To see the message store files, copy and paste:

  • Vista/W7: %USERPROFILE%\AppData\Local\Microsoft\Outlook
  • XP: %USERPROFILE%\Local Settings\Application Data\Microsoft\Outlook

Windows BCDEdit

“bcdedit”

Show All Entries: bcdedit /v
Delete: bcdedit /delete {XXXXXXXX-XXXX-XXXX-XXXX-XXXXXXXXXXXX}
Copy: bcdedit /copy { XXXXXXXX-XXXX-XXXX-XXXX-XXXXXXXXXXXX } /d “Name Here”
Set Time: bcdedit /timeout 5
Set Default: bcdedit /default { XXXXXXXX-XXXX-XXXX-XXXX-XXXXXXXXXXXX }

http://go.microsoft.com/fwlink/?LinkId=109528 (BCDEdit Commands)
http://technet.microsoft.com/en-us/library/dd799299%28WS.10%29.aspx (Adding
VHD)

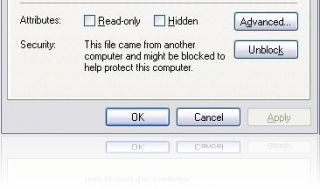
“This file came from another computer and might be blocked to help protect this computer”

OK, this option is simple to deal with:

  1. Right click the file
  2. Select “Unblock”
  3. Run the Application (*.exe)

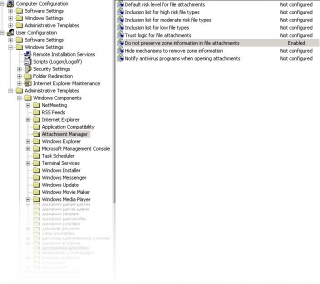
If you don’t want this option to keep coming up just change the following Group Policy setting:

  1. gpedit.msc
  2. User Configuration > Administrative Templates > Windows Components > Attachment Manager
  3. Enable: Do not preserve zone information in file attachments

Task Scheduler Disk Defragmenter

  1. Open Control Panel
  2. Double-click Scheduled Tasks
  3. Double-click Add Scheduled Task
  4. On the Scheduled Task Wizard dialog, click Next
  5. Click Browse
  6. In the Select Program to Schedule dialog, navigate to the windows\system32 folder
  7. Select defrag.exe
  8. Click Open
  9. In the Scheduled Task Wizard dialog, type a name for the scheduled task (Disk Defragmenter, for instance)
  10. Under Perform this task, select how often you wish Disk Defragmenter to run
  11. Click Next
  12. Set the time at which you wish the Disk Defragmenter scheduled task
    to run. This should be a time when your computer is on, but not in
    heavy use.
  13. Select the frequency at which you want the Disk Defragmenter
    scheduled task to run (Every Day, Weekdays, or Every days, where
    is the number of days between scheduled runs)
  14. Click Next
  15. Enter a user name under which the Disk Defragmenter scheduled task
    will run. Note: This user must be an administrator on the local
    machine.
  16. Enter the password for the user you entered in the previous step
  17. Confirm the password for the user
  18. Click Next
  19. Check Open advanced properties for this task when I click Finish
  20. Click Finish
  21. In the Run text box, you should see the full path and command for
    defrag.exe. By default, this path is C:\WINDOWS\SYSTEM32\defrag.exe
  22. Append the drive letter for the drive you wish to defragment to the
    command in the Run text box. In a default installation, your Run
    command will look like this:
    C:\WINDOWS\SYSTEM32\defrag.exe C:
  23. Click OK
  24. In the Set Account Information dialog, enter and confirm the
    password for the user listed in Run as
  25. Click OK

Source: http://support.microsoft.com/kb/555098

Windows Vista Icon path

  • Windows Vista has some better more fancy default icons
  • These are not shown as the default ones when “changing folder icons”
  • Change the “look for icons in this file” path to:
  • %SystemRoot%\System32\imageres.dll