Category Archives: Dell

VMware “TPM 2.0 device detected” | Dell PowerEdge

When deploying new ESX (v7.0.2 Ud) on new Dell PowerEdge (R350) server the following message appears after the installation of ESX and adding to vCenter


It appears that you can’t deploy out the box with a TPM tweak in the BIOS to allow clearing this error.
I placed the iDRAC console into “BIOS boot mode” (to save faffing about pressing “F8,F2,F5” keys, whichever one it is) before rebooting.

System BIOS -> System Security | Enable “Intel(R) TXT”

System BIOS -> System Security -> TPM Advanced Settings | Enabled “SHA256”

After a reboot of the host, the error can be cleared back in vCenter

Note: The server is not currently using “Secure Boot”

Dell PowerEdge Servers | Internal Dual SD Module (IDSDM) Failure

We are running Dell R620/630 servers with “Internal Dual SD Module” (IDSDM) for the VMware ESX installation.
Unfortunately SD card 1 recently developed a fault.
As the IDSDM is configured in a fail-over SD1 copies to SD2 therefore we had to swap the cards before performing the rebuild.

It is important to note a few IDSDM module behaviors: IDSDM White Paper

Mirror State Stored on the IDSDM module

The SD cards mirror state, along with the Disabled or Mirror mode for modular servers, is stored on the IDSDM module itself. This means that it is possible to move an IDSDM module between two systems and preserve the mirror; the BIOS will read the states from the cards during boot up and will reflect the state of the card in setup.

Master SD Card

The module design allows that either SD card slot can be the master; in the event of a tie between the two cards, then SD1 is picked as the master. For example, if two new SD cards are installed in the IDSDM while AC power is removed from the system, SD1 is considered the Active or master card in the mirror. SD2 is the backup card, and all file system IDSDM writes will go to both cards, but reads will occur only on SD1. If at any time SD1 fails or is removed, SD2 will automatically become the Active (master) card. The IDSDM module should not be serviced while AC power is present.


Continue reading

Dell PowerEdge Servers | iDRAC Interface & Connection Issues

Configuring iDRAC IP (From Windows)

If you want to configure the iDRAC while in Windows the best option is to install “Dell Open Manage Server Administrator” this will allow you to open the web interface and assign the iDRAC IP. The default iDRAC IP is “192.168.0.120” so unless you have a system on this subnet to connect you will need to use another method.

  • Default OMSA address: https://localhost:1311/
  • Authentication is using a standard Windows Administrator username/password without the “domain\”
  • The iDRAC options are displayed under: System -> Main System Chassis -> Remote Access

If you are configuring iDRAC outside windows the default login is:

  • Default Username: root
  • Default Password: Calvin

Unable to connect to iDRAC IP:

If you are unable to connect to the iDRAC via HTTP/Web Interface even though it is responding to ICMP (Ping) request it most likely needs a kick! or a reboot (of just that component) Best option is to putty into it.

Resets/Reboots iDRAC:

  • racadm racreset (Reset)
  • racadm -r <ip address> -u <username> -p <password> racreset(Passthough Credentials)
  • racadm -r <ip address> -i racreset (Prompt for Credentials)


Resets/Reboots iDRAC (Factory Defaults):

  • racadm racresetcfg (Reset)
  • racadm -r <ip address> -u <username> -p <password> racresetcfg (Passthough Credentials)
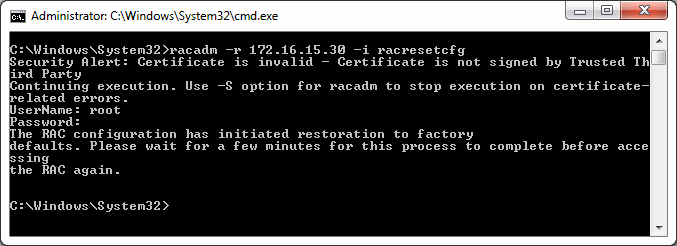
  • racadm -r <ip address> -i racresetcfg (Prompt for Credentials)

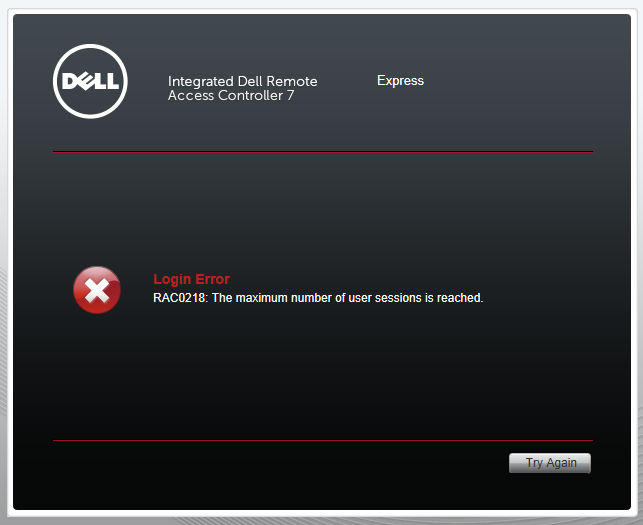
Unable to connect to iDRAC “Maximum number of user sessions is reached”

I tried to SSH to the IP using putty (Method Above) but got the same error.

In order to resolve this I used the following command from another server which had Dell Open Manage installed.

racadm -r 192.168.1.2 -u root -p Passw0rd racreset soft
racadm -r 192.168.1.2 -i racreset soft

Downloads: